Monday, August 25, 2014

Vacation Time!

Hey all, not much going on in the sewing studio these days :( I have started quilting Off Course. I'm not going to bore you to death with  days and days worth of quilting in process pictures. I now have the quilting plan all plotted out, just have to sit down and DO IT!

But that's not why I'm popping in, to complain about not having sewn in days. I'm popping in to say I am heading out to see my parents in MN tomorrow. I thought the fact that they are celebrating SIXTY - that's a 6 AND a 0 folks - years of wedded bliss deserved a visit in person, not just a phone call. OK, we know in 60 years, it might not have always been blissful, but if you asked my dad - he would tell you,  "Yes, it was!" How sweet is that? :)

I'll be gone for a week. I'm leaving The Nugs and Rubi in the capable hands of my husband. . . . they are going to be spoiled beyond belief when I get back! 
This post was seriously lacking in pictures and this one is just too cute LOL
So have a great week and if for some odd reason, there happens to be some sewing going on there - I'll post :)

Have a wonderfully quilty week and keep on quilting on!!

Friday, August 22, 2014

Confessions of a Quilt Addict

 quilty secrets


By now, I'm sure you have seen Amy's post over at 13 Spools. It's a fun post in which she airs her 10 Quilty Little Secrets :) Well. . . I have aired a lot of my quilty little secrets throughout my blog but here they are all in one place for all to see. . . I'm airing dirty laundry here folks, if you have a weak stomach, you should probably move on to the next blog in your reader ;) Hang on to your hats, here we go!

1. Cotton + Steel, Amy Butler, Pearl Bracelets - don't get it. Haven't any. Likely. Never. Will. :)

2. When IF I pin, I run over them when sewing. Always. Have I hit them? Yes. Has the world ended as a result? No. I put the pins there to keep the seams together when I sew over them. . . that's not happening if I take the pin out!!

3. I never have and never will pre-wash anything. . . The quilt is going to be washed when I finish (always) so why bother with another step that is going to make it a longer time for me to get to cutting and sewing.

4. Pre-Cuts. . . love to hate them (except fat quarters of course). After being burned on several occasions by the cuts being inaccurate. I'd rather have the person responsible for the inaccurate cuts there to beat (me) than to be cussing in the wind!

5. I use starch. A LOT of starch. I am not a best press fan. It's expensive and not as starchy as the cheap stuff. When I say a lot, I mean soak. Pre-washed in starch. :)

6. I iron press my seams open. Almost always. And I only use steam when pressing curved piecing. I don't try to convert anyone, please don't try to convert me to the dark side ;) HA

7. I can't don't follow patterns. I gotta be me right??!

8. I do not have any fabric in my stash that is 'too pretty' or 'too special' to cut into. . . I bought it to sew with and sew I will! When I get fabric, I rip open the package with glee and hack off a corner just because! grin

9. I am not a scrap lover/quilt maker. Love them from afar, do not like making them. . . I keep scraps, I have a couple of bags. . . they will never get used. I kept them because I knew someone would yell at me if I ever did a post like this and admitted that I had thrown them all away ;)

10. I don't have any UFOs. . . STOP! Don't throw any rocks just yet! I totally understand how UFO happens. . . No, I didn't forget a word, I did that on purpose ;) I will NOT let myself start another project unless the two I am working on are finished (I have on occasion had three going but it makes me nervous). I think it spurs me on to get what I'm working on done so I can start what I have planned while FMQing the two quilts I am finishing. Besides, I would just sit here and look at everything half finished, wonder what to do next, and get nothing done ;)

There you have it! What are your quilty little secrets??

One more thing, that great quilting in the button Amy made? She finished the quilt, you have to check it out!! Nothing short of awesome!

Until next time, keep on quilting!!
Follow on Bloglovin

Monday, August 18, 2014

Spin FINALLY finished!!

It's a wrap for spin :) I can't get that song out of my head. . . "You spin me right round baby right round like record baby. . . " Here, just for you so you can have it stuck in your head too, it's the Chipmunks version so it will be more likely to stick!  I know, I'm totally dating myself but hey, the clock keeps ticking. . . and ticking. . . and ticking haha

Anyway back to Spin. I quite honestly never thought this 'it is finished' post would ever come for this problem child quilt!! It is the traditional Dutchman's Puzzle block put together with my own little modern twist.  I was researching different ways to make Flying Geese and stumbled upon the Dutchman's Puzzle block made in horrifically awful fabric (IMHO) but I was able to look past that and see that this is one very cool block!  I took it to EQ7 and started playing. That's how Spin was hatched. Here she is in all of her glory. As usual, pictures first!


Front (said Captain Obvious LOL)

Loving the back as much as the front.
And now for some close ups. There are several. . . I did not put in all of the pictures I took. . . really!
I just love how quilting just transforms a quilt into textured goodness!

Some might remember that I thought about adding more quilting to this star to tame the poof.... It has grown on me :)

I am however most likely going to add some quilting to the stars in the negative space. . . they are looking pretty loosey goosey to me. . . What do you think?

I added on line of quilting to this star but I'm thinking either a square in the middle with a flower in it or a line point to point intersecting in the middle. . . At least if I hate it, it's not much ripping ;)
More close ups, this time of the back :)
Seriously in love with Carol Friedlander's Widescreen backing! Quilting sings and it is busy enough that a magnifying glass is needed to see any stops/starts or oopsies :) What's not to love?? 

Last one. Ahh, feels SO good to be at the finish line with this one!!
Quilt Stats:
Size 61" x 60"
Fabric: All of the fabric is Modern Basics by In The Beginning. Backing is Widescreen by Carol Friedlander (quickly becoming my absolutely all time favorite backing fabric!!).
Batting: I used a double bat, Quilter's Dream Wool and Quilter's Dream Select
Thread: Aurifil Wine, Grey Smoke (front) and Light Grey (entire back) and various colors of blue and black Isocord.
Technique that was new to me: Paper piecing!!

Here's the low down on this quilt in terms of what I learned:

1. Paper piecing flying geese was the best way to make consistently accurate flying geese for me. Although, I'm not a fan of ripping paper off after all the sewing is done. 

2. There is not a lot of difference between the more expensive specifically made for paper piecing paper and newspaper print paper that is WAY cheaper. A quick search on Amazon will provide several options for buying.

3. I washed and blocked the quilt PRIOR to binding. I did not have any disasters as a result. I'm sure you noticed that this quilt is heavily quilted - that saved me, if it hadn't been, zigzagging around the edges would have been a must. I probably will not wash before binding again. . . it was a technique I had seen several times and wanted to give it a try. I did. Now I know :)

4. Binding can make or break a quilt (and the quilt maker LOL)! I had a flat quilt, put the binding on and had ripply ends. I hand sewed the binding down for the first time on this quilt. I was not a happy camper. I took it off. I decided to try to use the same binding. Sprayed it with water and set it out in the 115 degree heat to dry (drying time 1.5 minutes LOL). Sewed it back on, started hand sewing the binding down. All is looking good. . .Got half way around and realized I had sewn the binding onto the BACK of the quilt and was hand sewing it to the front. I won't even go into the words that flew out of my mouth.... Again, took the binding off the quilt. Ordered new fabric as I knew, if I used the same binding, there was no way that the third time was going to be charming in this case. Then I remembered I had some of the fabric left over. Holy wow, I had JUST enough (like there was not even 1/2 inch left on either side of the fabric after I finished cutting!! 

5. I love Sharon Schambers and her willingness to share her methods! I don't know her. But I found this tutorial on binding and it saved my life sanity! It's long, but SO worth it!! I did absolutely EVERYTHING she said. The gluing made it so I was not fighting the quilt AT ALL in the machine sewing to the front OR the hand sewing to the back. The mitered corners on this sucker are perfect. I cannot even tell you how pleased I am with the results! I'm going to buy stock in Elmer's! ;) Oh and this is the reason I won't be washing my quilt before binding - I am going to have to wash this one again to get the glue out. Washing it again is not a big deal but I'm not going to wash first in the future knowing it will have to be washed again.

So in the end, third time was the charm in putting the binding on this quilt. . . I do NOT recommend making three attempts at binding the same quilt. Quite honestly, there were times I had serious doubts as to whether I would ever finish this quilt! 

The Making of Spin saga is over and I couldn't be more pleased with the results! Now I am off to continue the quilting on Off Course. Yes, I have taken it out of time out. I sent a picture to Kathleen over at Kathleen Quilts and she worked her magic with quilting ideas! Seriously people, she will do the same for your quilt, she does a different one every Friday. Check it out! Her quilting is amazing. Seeing her design ideas broke me out of the box and provided me with the inspiration I needed to ultimately start quilting! If you are feeling stuck as to how to quilt something, she does a great job of breaking the "I don't know what to quiltitis" . . . that's a word really it is!

Linking up with Design Wall Mondays, Let's Bee Social, WIP, NTT and Finish It Up Friday. . . and any other place I can think of LOL If you haven't already, hop over to any of these lovely blogs and be inspired!!

Until next time, keep on quilting!!
Follow on Bloglovin

Tuesday, August 12, 2014

PSST!! Come here!

Shhh, don't make a lot of noise, mom will hear you! It's Nugget! 

Remember me from this post???
Yup, I hacked into mom's account - but don't tell her! I wanted to let you know that I really was trying to help with that quilt - I'm telling ya, toooooo much orange! I love orange, but that was OVER THE TOP! So I helped her, really I did! Sometimes I think I should help her now, but oh boy, she got so mad - hyperventilating I tell ya!! I'm a good pup and I don't like to see mom mad so I don't do that anymore. Even though sometimes. . . I'm telling ya, she needs my help! But we will talk about that another day. . . 

I hacked in to Mom's account to tell you, the voting has started for the Pets on Quilts Show! Go over and vote for me if you think I'm cute. . . I'm number 12.

I thought maybe a puppy picture would help. . . AWWWW! How could anyone get mad at MY face???
Don't get me wrong, I'm a handsome boy and I don't have to throw down the puppy pictures but hey, all's fair OUOOOO! That's how I spell the sound of my howl - oh yeah, I howl, a lot.

Mom won't tell you about it and if she did she would probably tell you  to go over there and look at all of the great entries (she tells me 83!! . . . my number is 12) and vote for your favorite (ME! number 12) :) I'm not that magnanimous. . . did you see what I looked like as a puppy???

OK, I admit it, I'm workin' it here! Go vote!
 I should also show you a picture of my sister, Rubi. We fight constantly, but we wuv each other bunches. We're really not fighting most of the time, that's just how we play. See, here we are sharing:

This is what ya call team work folks!
Oops, gotta go! Mom's calling! Remember DON'T tell her! It'll be our little secret :) Hop over to Lily Pad Quilting and vote for your favorite in each of the categories!


Stacked Diamonds Redux!

I have been busy playing with my Side Kick Ruler and the Diamond Stack tutorial. I took tons of pictures of the process and planned on doing a post. Something I have not shared on this blog is that I spent 15 years of my working life as an Intellectual Property paralegal. Having this background makes me very sensitive to stepping on anyone's toes when it comes to their work. So I emailed Anna who blogs at Six White Horses and asked her if she minded if I showed the making of this block using the Sidekick and making a few tweaks. She emailed me back and said go for it, just link back to the original. If you question in your mind if you should ask before you do something, the answer is, you probably should. Is it 'illegal' if you don't? Maybe, maybe not, but for sure it is being a considerate blogger and a good neighbor :)

OK, HERE WE GO!! :) - Warning, this post is picture HEAVY! AND this is NOT a quick make. . . just saying. Accuracy in cutting and in seams is essential. And STARCH the bejeebers out of the fabric BEFORE cutting. Really, you'll be glad you did. I'm not trying to talk anyone out of doing this - I absolutely love making these, I just want to give full disclosure up front. :) I like to do things backwards, so here is a picture of the resulting block diamond . . . so you can decide whether or not to keep reading :)

This diamond measures 19.25" horizontally point to point X 32" vertically point to point. It's big! :)
First, you can make this starting with whatever size diamond you want - it just depends on how big you want your resulting diamond to be. I used 3.5" strips to cut my diamonds. 

From the strips and using the Sidekick I cut 9 diamonds from three different fabrics. Here's the first way this ruler is handy:


Line up the ruler to the 3 1/2" line and cut end off strip.

Flip the ruler over (notice on the picture above Sidekick is upside down and in this picture it is right side up. Am I the only one that has issues figuring out where to put rulers when dealing with diamonds or triangles? OK, don't answer that! :)
And from whatever fabric you choose for your outside frame, cut eight 1" by 18" (length of fat quarter, if the fat quarter is a little shorter like an inch or less than 18", it can still be used). BAM! You are done cutting! And you have stacks of pretty fabric that will look like this:

Tip, if you are using directional fabric - make sure that all cuts are pointed in the same direction. If you cut your diamonds at the same time, this won't be an issue. . . If you stop and come back a few days later. . . Might be an issue - no need to ask me how I know. . . 
Now take those pretty diamonds and lay them out in your diamond grid.

Eagle eyes will see that the way my grid looks now, is NOT how my blocks ended up. . . :) I have NO idea haha
We are now ready to sew! First, we are going to sew the diamonds to the pink strip. Here's why I can't give you measurements for the length of the strip you will need. . . I plopped those diamonds on and just kept sewing. First, take the three diamonds that are at #1 in each row and sew them with a very accurate AND straight 1/4" seam. I ended up with this:


Just make sure enough strip is left ABOVE the first diamond to make the angle of the diamond extend to the opposite side of the strip. . . sorry, I cut the top off in the picture :(
I could have also sewn the diamonds in the #2 spot onto the strip. . . I don't have a good reason as to why! When I make more, I definitely will!

Now you are going to cut the strips resulting in individual units. Here's how:

Line up the ruler to the 3 1/2 inch line and the edge of the ruler at each side and then, to ensure the angle is accurately cut, see how the top of the pink fabric is lined up with the 3 1/2 inch mark on the top. If all three of these lines do not 'match up', there might be some creative sewing in your future to get all of the units sewn together. . .

For the second cut, flip the ruler over, line up the 3 1/2 inch line again and make the cut. Tip: Sewing an accurate AND very straight 1/4" seam is essential.
Keep cutting and flipping the ruler, cutting, flipping the ruler until you have all 6 (let's assume you have sewn all #1 and #2 diamonds onto the first strip). Until you have this:


Here is the first picture that it is clear, I ended up with a different configuration. . . hmmm I do like this one better! :)
Now we are going to sew the #1 to #2 to #3. A picture to hopefully help when trying to figure out how those darn angles are supposed to be sewn

Lay unit #1 over #2 like so. Make sure you have the "ears" poking out from the top and the bottom. They should be overlapped enough so that when the piece is sewn, the needle can be positioned exactly at the intersection of the two pieces and when sewn, the seam will be an accurate 1/4."
Sew together all units #1 and #2 chain style if you wish :) I even cut the first one off after I had all three sewn, and then sewed #3 for that row, cut the second one off, sewed #3 for that row and sew on... Now you have this:


Now is a good time to snip off those dog ears. I used my straight ruler and just made sure the strip was still consistently 3.5" wide.
Next, sew on the long pink strips on the outside and inside of strip one, the right side of strip 2 and the outside of strip 3 (moving left to right). Again, when sewing on the strips, make sure there is enough strip left to extend the angle to the end of the strip when you cut. Again, when I did this, I sewed the first one on, the second and the third (make sure the strip is being sewn on the correct side!!) on one strip of fabric. Then I cut them apart as I did the diamonds in the first step. Again, the Sidekick ruler can be used to ensure that seams are lining up correctly:


And now you have this.
Sew pink strips on the remaining two sides:


And trim maintaining angles. It is worth noting, that if you want all of your inside frames to be the same width (mine are not and I kind of like the effect) trim the outside pink strips to be the same width as the resulting (we're getting to that) inside frames. If you are using all of the same measurements I am using, you would trim those outside strips to 1 inch (that includes the 1/4" for seam allowance)
Here's the fun part. Now we are going to cut this apart. How crazy is that?? Cut the pink finished strip in half (measure 3/4" from outside edge of diamond) like this:


Sew on the 1 inch strips to the outside and inside of the first strip, the right side of the second strip and the outside of the third strip. Should look like this:

Trim all tails:


Sew outside strips to inside strip to look like this:


Now cut the other way, same 3/4" inch (remember, if you are using different sized strips, just cut those strips in half) the other direction like this:


Confession time. I got sick of taking pictures at this point. . . Here's the rest of the story with no pictures. Sew the remaining four strips to the outside and inside of strip one, right side of strip two and outside of strip three. Trim. Sew strips together and you should end up with this!


 OK, that's cool, now what do you do with it??? :) How about make six, place in a star configuration - how awesome would that be?? I'm gonna be honest, I haven't figured out how I would turn that into a square quilt - but I'm going to ;) 

How about just put them in rows? The 'filling' to make a square quilt would be great negative space to do some pretty stellar quilting, don't you think?? 

If you have any questions about making this, please either comment or send me an email - quiltmusings@gmail.com. If you leave a question in the comments, I will answer in the comments and email you back. I'm guessing if one person has the question, another will have the same :) 

Linking up with Lee for WIP Wednesday and Lorna for Let's Bee Social and Kelly for NTT and Crazy Mom Quilts for Finish It Up Friday.

Until next time, keep on quilting!!
Follow on Bloglovin

Monday, August 4, 2014

Blog Hop: Phase II :)

Hi all!! Hope you all had a wonderful, wonderful weekend! Mine was busy. . . with not much to show. . . haha  Today is the day that the three lovely ladies that I tagged in last Monday's post will post their WIPs and share about their process and each of them will tag three more bloggers! Make sure to check out (in no particular order - if I could put them all first I surely would!) all three blogs, I'm so sure you are going to fall as in love with them as I am :)


Helen at Til We Quilt Again. Helen has a long arm quilting business, her quilting and the quilts she makes are absolutely amazing. I just know you are going to be inspired by her work! Helen is in NJ, USA

One of Helen's quilts. Sometimes I just go to her blog and look at this quilt. . . usually when I am ripping my hair out seams. . . or quilting . . . ;)
Marly at Marly's Quilts. Marly's quilts are very meticulously made! I met Marly through the Triangle Quilt Along. We limped along (I limped WAY more than she did!) together and were both able to finish and link up just under the wire :) Marly is in the Netherlands!

Marly's Triangle Quilt - Don't the colors just make you happy??
 Sandra at Musings of a Menopausal Melon. The name of her blog was what pulled me into her blog initially. The amazing quilts and her sense of humor is what had me hooked reading for hours much longer than I should have :) and keeps me coming back for more! Oh yeah, and she lives in Canada :)

This is Sandra's Gear Quilt! Too awesome for words!

I covered three countries and two continents! Now get to traveling! Hop over check out what these ladies have to share with you and stay for awhile, have a look around and say hi :)

Now just for a brief update. . . I have been working on stuff. . . really I have!! I decided Friday morning I was going to put my big girl panties on and quilt Off Course. . . I started with two leftover blocks, it looked good, I have a plan. . . then I started with the quilt. . . SID around one block, decided I wanted to see what it would look like on the quilt so started quilting. Got one wing of one goose done. . . started on the other side. WRINKLE. On the front. That 10 minutes of quilting something that kind of looks like McTavishing, took over an hour to pick out. :( It's back on the wall in time out!

Remember these?


Well I used this:


I DID NOT take this picture this way. . . have no idea why it turned and I'm too tired lazy to change it...
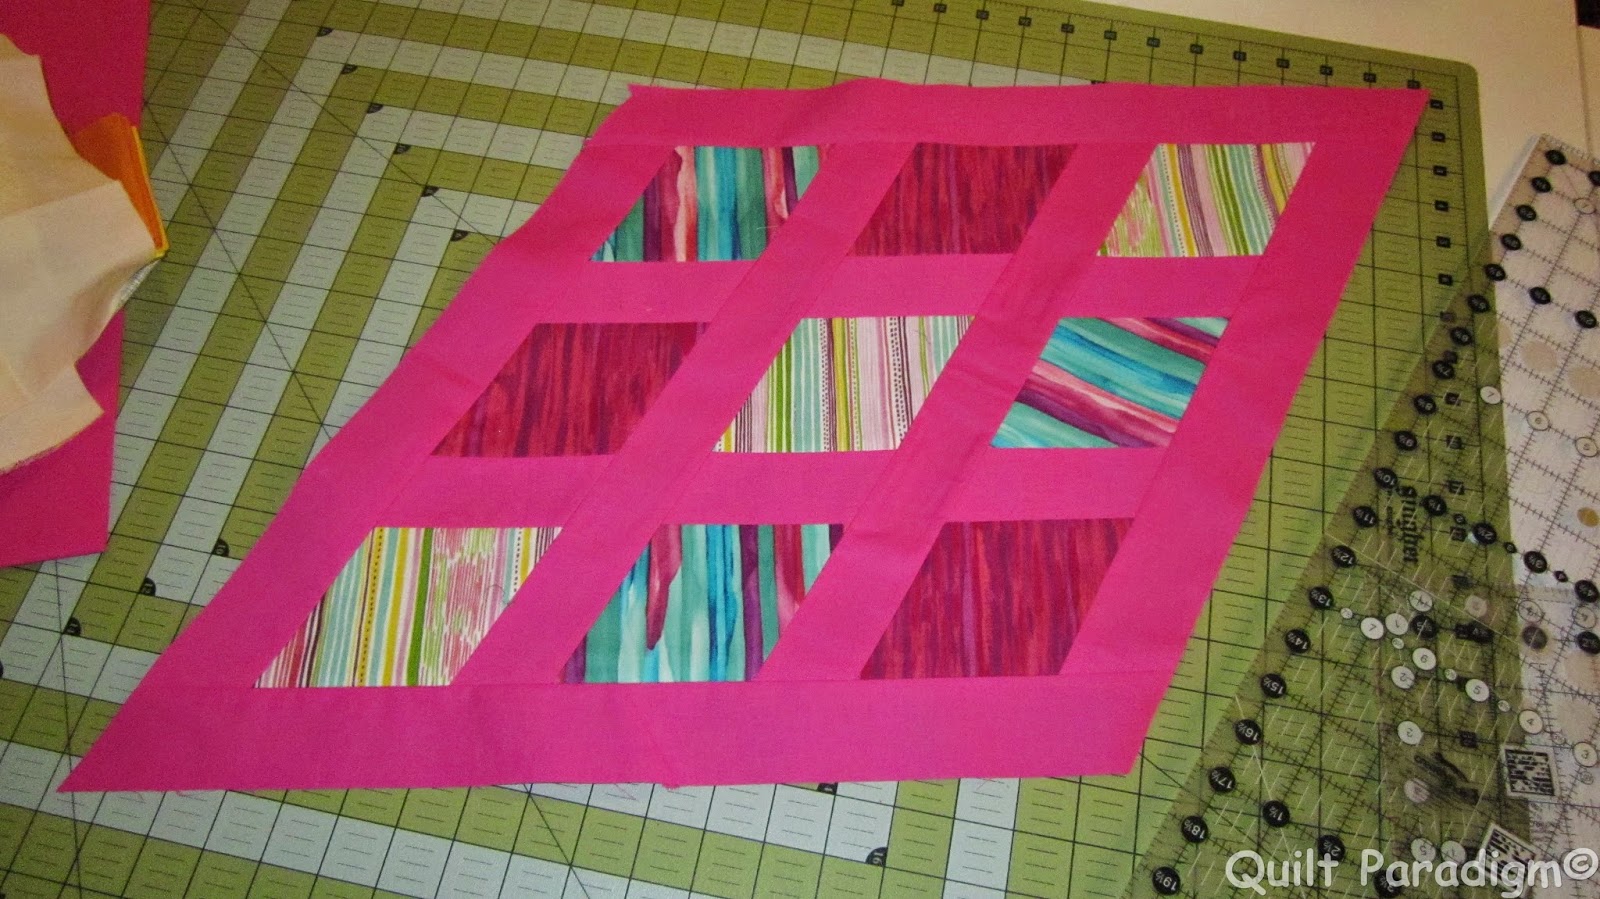
To make this:


Made from Rogue fat quarters I had laying around begging to be used for something.
I'm going to make a few tweaks, maybe make it smaller, it ended up being 14.5" x 25" (point to point). I of course started with bigger squares than the tutorial called for :) In my next post I will take better pictures, hopefully of the actual blocks, and how I made mine different :) AND more importantly, how the Sidekick ruler made making this block relatively easy - and I did not have to trim off on little iddy biddy piece to make this block look as it does - way cool!

Spin update. . . my binding hell. . . All looked good, flat as a pancake. . . hand sewing down binding, almost half way there and making great progress. . . and then . . . realized I had sewn the binding onto the back and was hand sewing the binding onto the front!! Come ON! I almost cried. Told my husband this quilt is destined NEVER to be finished :( Speaking of binding - Sharon Schambers has a seriously awesome binding tutorial. . . I have not done one like this yet but you can bet the next quilt I bind (like maybe Spin. . . ) will be done exactly like this!!

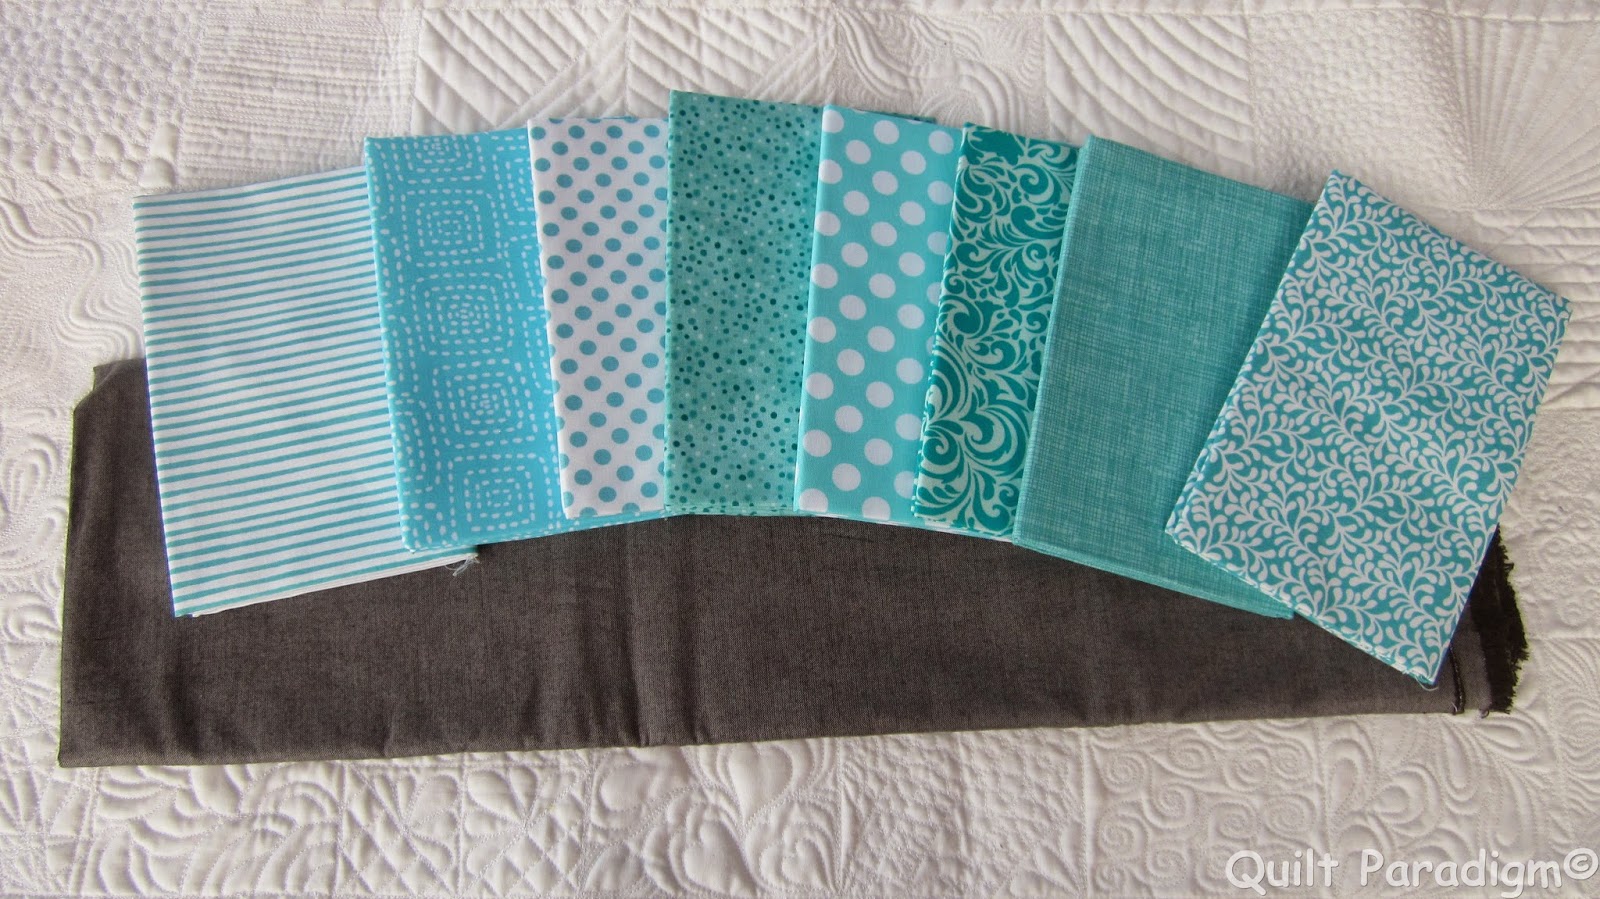
I think this one is going to have to be called Aqua Awesomeness.... 

Linking up with Patchwork Times for Design Wall Monday, Anything Goes Mondays being hosted by Paula at the Sassy Quilter and Crazy Mom Quilts for Finish it Up Friday.

Until next time, keep on quilting!
Follow on Bloglovin


Saturday, August 2, 2014

Pets On Quilts!

Being relatively new to blogging I had never heard of this Pets on Quilts thing. . . but how cool is it to have a linky party showing off our pets on our quilts or quilts on pets? Pretty darn cool, I'd say :)

If you have pets and I know you have quilts, join the fun!

http://lilypadquilting.blogspot.com/2014/08/pets-on-quilts-show-2014.html


Years ago, we rescued three Siberian Huskies. Pablo, Bandit and Bear. LOVED those dogs! Siberians are a misunderstood breed and can quickly get themselves into trouble if the owner does not understand the quirks that are part of who the Sibe is. Pablo was an escape artist, runner and he may or may not have chased down a cat. . . or two . . . He was two when my husband flew to OR to rescue him. My husband and I met just months after their fateful paring :) We then rescued Bandit. She was treated as a farm dog with little to 'pen' her in. . . and decided one day to go play with the neighbor's chickens. . . Now, even though this neighbor happened to be the exact person that GAVE this wonderful pup to her then owners as a wedding gift (WHO DOES THAT???). . . she had to go. She was a gangly 18 month old at the time. About a year later my husband found Bear on the internet. . . hubby said we HAD to rescue him, he was 7, no one would want him. . . So he drove to OR and brought him home. . . Why would someone give up a dog they had raised from a pup 7 years later? Ummm. . . he ate the family cat. The lesson in all of this? Sibes and cats DO NOT mix. They might be fine for awhile, they might be fine for their entire life - but is it worth the chance to take with Fluffy? I'd say probably not. But that's just me. Running is in their blood and they are escape artists - if they find a way out, they will run until they drop. AND if they find a cat or two on the way, well, it's not going to end well.

But I digress :) The loss of these three fur babes was devastating. Bandit was the last to leave us and after that it took well over a year for us to even consider getting another. My husband decided he had to have a puppy. . . I knew once we had one, we would end up with two. . . Sibes are pack animals, they need a compatriot with whom to get into trouble. . . So we got Rubi, when she was 9 mos old we got Nugget. Rubi is full Sibe, Nugget (we call him The Nug) is half Sibe, half Malamute. Initially, Rubi was NOT happy about Nugget's arrival. Rubi now just over 2 yrs and Nugget is 1 1/2 yrs. This is a story of a quilt, a puppy and a not so happy puppy mamma quilter. . . 

Nugget was 7 months old when the incident occurred. I was a newly addicted quiltaholic. I had made three quilts. I had collected many patterns. I asked my husband which one I should make next. He picked Out of Square by Karla Alexander. No problem. . . ;) This is pre blog so I'm gonna admit, I don't have much for pictures for the process but let's just say I struggled a bit. . . I'd finish a set of 6 blocks, put them on my newly assembled design wall and move on to the next 6. Pretty soon I had that design wall covered with beautiful blocks and I was doing the block shuffle trying to get them in the perfect arrangement. Nugget watched this with great interest. . . Isn't he handsome?

He hates to have his picture taken. . . there is always something WAY more interesting to look at :)
Also apparently with great appetite. . . 

Had fun with it didn't ya little fella?

This is the first of THREE blocks he would 'eat' . . . yes, he is still alive ;) No one knows for sure how this got started. . . we think that Rubi may have taken them off the wall and given them to him. Yes, she is just that wenchy. . . she would come tell me when he had one in his mouth, but only of course after they were destroyed. . . 

I didn't have fabric to remake the blocks. . . or, more importantly, the ambition. I was quite over making those blocks! And there was too much orange in the quilt. . . my husband came up with a brilliant solution. Remove two rows. . . Every square I removed was predominately orange. . . and the result was pretty pleasing don't you think?

Yup, there are curves in there and yes my fourth quilt was set on point. . . naive or crazy? I'll let you decide ;)
  
Nugget is older now, less apt to chew but still not 100% trusted. . . and here he is displaying the quilt he 'helped' make this is quilt on pet, not pet on quilt. . . it's the only way I could get any kind of picture. . .:

The Nug looks so regal don't you think? OK AND a little more than disinterested in this photo shoot! So above it all :)
So there is my story of a quiltaholic, a pup and the joint venture of making a quilt :) Did I mention he chewed a big chunk out of my husband's quilt, the first quilt I ever made? . . . still haven't figured out how to fix that. . .

Linking up with Lilly Pad Quilting for the pups and dogs on quilts category. Go check out all of the other great posts and if you have an animal and a quilt, link a post of your own! :)

Linking up with Crazy Mom Quilts for Finish it up Friday.


Until next time, keep on quilting!
Follow on Bloglovin