Friday, March 28, 2014

Triangle QAL - Week 2, A Pictorial

Here's my Triangle QAL update for Week 2 in pictures :)


Yummm, fabric layer cake!

With ZERO calories!!!

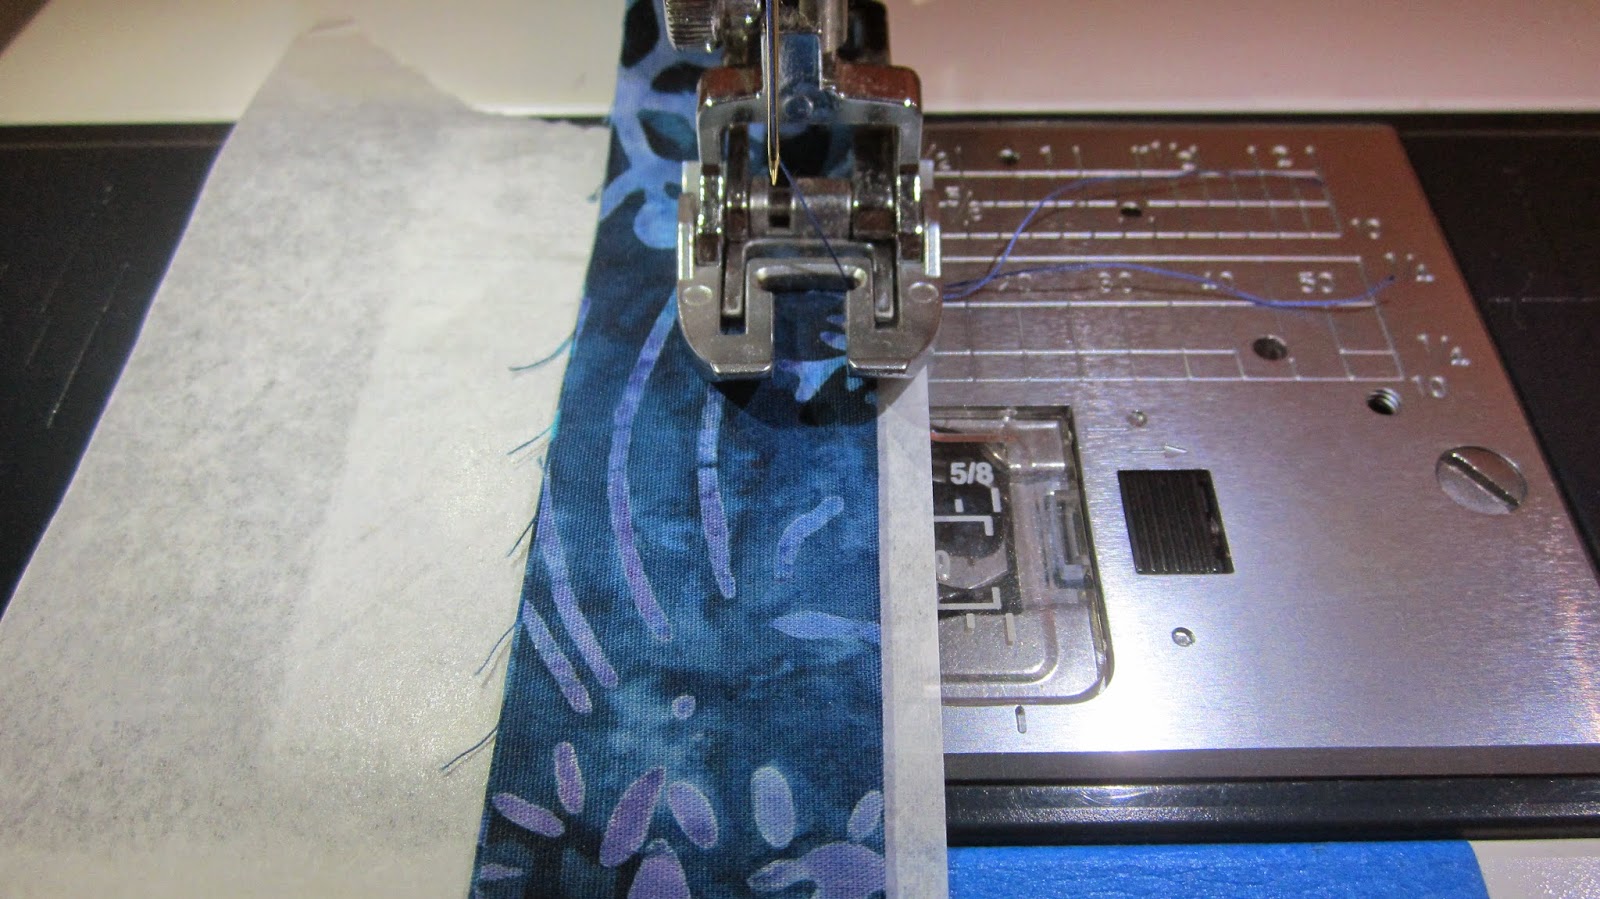
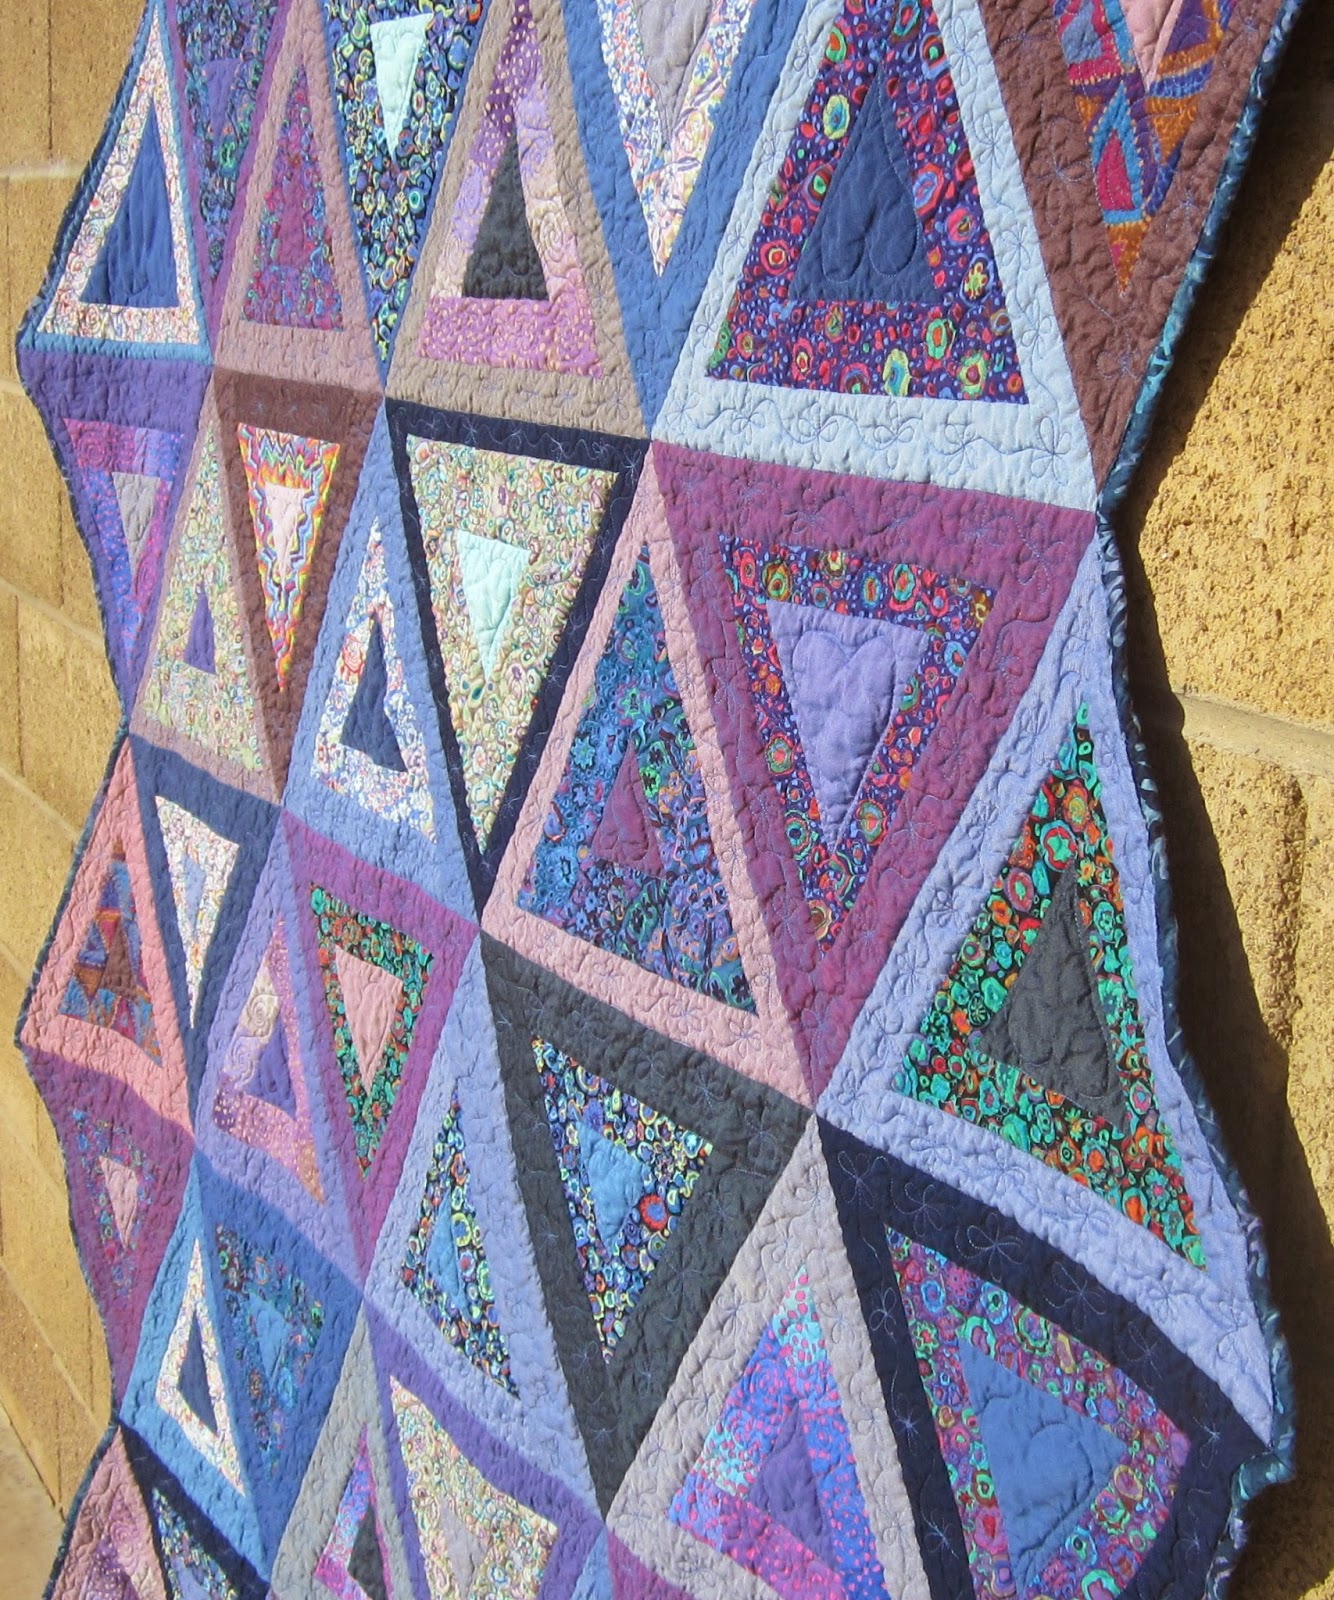
What will they become?? Well duh, a triangle quilt! haha Sewing rows starts next week!  There's still time to join the pointy fun!! Head over and see Paula at Sassy Quilter, grab the button, some fabric and start cutting! :)

Linking up with Paula over at Sassy Quilter for Week 2, Cutting, Sew She Can for Show It Off Saturday and My Go Go Life for SewJo Saturday, Stitch by Stitch for Anything Goes Monday and Patchwork Times for Design Wall Mondays.

Until next time, keep on quilting!

 Follow on Bloglovin

Wednesday, March 26, 2014

Angled Edges Binding Tutorial

Sorry about the delay with posting this folks, I had to get my shtuff together for my tax appt. today. . . Real life responsibilities - SO over rated!! haha But I'm ready now so here we go!!

First, I decided the narrower the starting strips were, the easier it would be to manage.  I think this was a wise decision (I conferred with my engineer husband on this and he agreed so I knew I was headed in the right direction haha).  So I cut the strips at 2 1/4 inches.


As far as how long to make your binding. . . for those of you who have been following me know - me + math = disaster.  I just kept cutting strips until I thought I had enough and guessing worked out well! I actually cut the perfect number of strips.  Sometimes the quilting angels do smile down on me!

Sew your strips together. I sew mine together at an angle to reduce bulk.  I also iron those seams open (GASP) to further reduce bulk.  I have had questions about how I do my labeling on the binding - this is where I do the monogramming on the binding.  I hold the binding up to the quilt, figure out the approximate position as to where I want the label to fall and pin it to mark the spot where to start the monogram.  I use thin papers as a stabilizer when I do the monogramming.


I use my walking foot.  I've tried the other foot - I find using the walking foot reduces the 'bunching' that can happen when doing monograms.  As you can see in the photo, place the folded side of the binding to the right.  I position the material so I can just barely see the edge of the binding peaking through the edge of the opening in the middle of the walking foot.  I find this gives me the perfect distance to be able to put my stitching for the binding (I machine finish my binding).  As far as what I put on my label - it depends on who the quilt is being given to and the occasion, if there is one.  Examples might be "Happy Birthday X Stitched With Love by Judy 2014" or "X's Quilt Stitched With Love by Judy 2014" 


Depending on binding and thread choice, the 'label' will be more or less visible.  I have done quilts on which the label was very visible and others, like this one, are less visible.

When you set your desired wording - check it five times for spelling. . . ask me how I know this. . .

Nuff said! :)
OK, back to angled binding :)

I sew the binding on the back of the quilt first.  Mark your seam lines (1/4 inch) in both directions.

Bad marking job.... I have issues with Frixion pens!
 Do this on all angles - on this quilt, there were no 90 degree angles so all of them got marked.  When sewing on the binding stop right at the intersection of the sewing lines drawn, turn the quilt and sew to the "corner" off the edge of the quilt:

This is an angle that is like this > (pointing out) . . . :)
This is an inverted angle or < . . . see the edge of the quilt to the right of the binding.
Then fold the binding back so the binding is against the short seam sewn off the quilt:

I put a pin back far enough that it is not going to get hit by the needle and I leave it in when I start sewing to hold everything in place.
Then, for the angles pointing out fold the binding down so the binding is exactly on the edge of the quilt.  It is important to play with the positioning to make sure that there is no extra fabric right at the edge of the quilt at the point that the seam was sewn off the quilt: 

Sorry about the size of the wording in the picture - I was pretty impressed with myself to even get it in there LOL


For the inverted angles, fold the binding down so it is positioned over the edge of the quilt:

This one is a little better in terms of font size :)


On the inverted angles, I found that the more I played with where that fold ended up, the better it looked when the binding is attached to the front.  Get that fold as far down as you can, the outside edge of the binding is going to flip up, you want it to, the more it flips up, the less material you are going to have to deal with when you flip it to the front.  

Again, for both types of angles, I put the pin in to the left of where the seam would be so I could leave the pin in when I started sewing.  I marked with a marking pen the exact spot where I ended the previous seam and then put my needle down in that spot.  This is where you want your seam to start.  Then continue down to your next angle :) 

I just realized that I did not take any pictures when I was sewing the binding on the front :(  I'm going to try to talk you through this... For the angles pointing out, you will be able to fold the material in the same way that you do with a 90 degree angle to get a mitered corner.  I read a tip somewhere once that if it doesn't look right when it is folded, try starting with folding the other side down first.  I have found this to be very helpful.  


I promise I had not been drinking when I sewed this down LOL

Nice Miter, if I do say so myself!
I was not able to figure out how to fold the 60 degree angles at the two corners of the quilt so that they were mitered.  


Nice miter on the back

The fold on the front is even with the edge of the quilt which I decided was good enough in the end.
For the inverted angles, when sewing the binding down on the front, I sewed to where the seam was at 1/4 inch from the where the angle started to go the other way and turned the quilt and started sewing the binding down so a corner formed:


I think maybe you can see more clearly on the back where I turned the quilt and started stitching down the other side of the angle.
OK, there it is.  I hope this is enough detail that you can do your own angled quilt binding :) If you have any questions, please post in comments or send me an email (quiltmusings@gmail.com). 

Overall, I'm pleased with the result! I will say this, I am doing the triangle quilt along and I will NOT be doing this again on that quilt... It's just too soon LOL

Linking up with Lorna over at Sew Fresh Quilts for Let's Bee Social and Lee over at Freshly Pieced for WIP Wednesday. Thursday linking up with My Quilt Infatuation for NTT and Pretty Bobbins for I Quilt Sew She Can for Show It Off Saturday and My Go Go Life for SewJo Saturday.

Until next time, keep on quilting!! 

Follow on Bloglovin


Monday, March 24, 2014

TA DA! Triangle Log Cabin :)

It is FINISHED! And now the much awaited (my me anyway LOL) reveal of the Triangle Log Cabin! You can find a tutorial for how to make the triangles here.  So without further rambling cuz I know you just came to look at pictures and I'll do plenty rambling after the pictures ;) here it is!


LOVE LOVE LOVE :)

Quilting looks SOOO cool on the back!!
Some close ups. . . OK A LOT of close ups :) 


Washed and crinkly :)

Quilting this quilt reminded me how much I LOVE FMQing!!

VERY sunny this morning, yup that's my shadow LOL

Back looks seriously cool! IMHO :)

Washing really made the quilting come out on the dark blue.
More, just thrown over a chair, just cuz I couldn't stop taking pictures! And a couple close ups of the binding on the angles.  I have more pics of that and will definitely be sharing more in the tutorial post on binding angles.

The colors!!! SO in love with Oakshotts!!

Yummy :)

Going to be hard to ship this one off!!

Close up of binding.

Washing REALLY improved the look of the binding on the inverted angles.

What the back side of the binding looks like. 

One more just cuz :)
Quilt Stats:
Size: 58 "x 65 1/2"
Fabric: OAKSHOTT COTTONS! All of the solids are Oakshotts. See more on that below.  The prints are Kaffe Fasset and Brandon Malby.  The backing is various fabrics from my stash. . . the smaller pieces are Suede by P&B Textiles, the batik pieces are Polynesian Batik Royal Blue Medallion and the other batik is also Polynesian but I do not know the print. . . 
Batting: Quilter's Dream Wool of course :)
Quilting Thread: Superior King Tut Lapis Lazull (LOVE the color variation in this one!!)

First a bit about the Oakshott Cottons.  I have worked with Kaffe Fassett Shots and now Oakshott's. I don't represent either company (haha, that would be cool but I'm just a quilter with an opinion) so here's the down and dirty.  Oakshots are richer in color, easier to work with because they are thicker and when they are quilted result in an even more intense visual of the different colors in the weave.  Basically, I am in love :) Kaffe Fassett Shots are easier to find in the US.  A big plus if you are the type that wants to touch and feel before buying.  

I purchased my Oakshotts from Contemporary Cloth.  Customer service is exemplary and Sondra has the largest selection of Oakshotts (in the US) on the web that I found (also not affiliated in any way with Contemporary Cloth, I'm just a really happy customer who thinks it is important to share stories of wonderful experiences with customer service, not just the horror stories).  I recommend the Lakes collection! Oh my, those purples and blues are simply delish! I have enough (OK OK I went a little crazy and got the Lakes FQ bundle, the Lipari FQ bundle, the Italy Fat Eighth bundle, the Impressions FE bundle) for another quilt - it hasn't completely taken shape in my head but it is forming! Sondra mentioned that Michael Oakshott had said how wonderfully the cottons work with batiks (Holy Wow - my two favorite types of fabric in ONE QUILT???) so stay tuned for something that just has to be awesome with that combo! :)

On to the quilting! I have been doing a lot of straight line quilting lately and neglecting my FM practice.  When I decided on the design for the quilting, I thought it would go quickly. . . And it might have but here's what I learned in the process of quilting this quilt - setting my speed regulator to the middle is a good thing.  I took Cindy Needham's Craftsy class and she made a comment during that class about the machine sounding like Mamma Bear (you know from the three bear's fame - Pappa Bear, top speed, Mamma Bear, medium and Baby Bear, barely moving) speed.  This really worked for me to see a major difference in consistency in stitch length.  

Another MAJOR lesson - DO NOT QUILT WHEN DISTRACTED! I didn't take a picture, I couldn't bring myself to do it. . . But believe me it did happen. . . A friend stopped by to use our copy machine.  I'm typically here with just my dogs during the day.  She's just making copies, not really saying much because she knew I wanted to finish. . . when she left I went to start in again, had to reposition the quilt and DOH! I had quilted the TOP of the quilt to the MIDDLE of the quilt!! :( Holy disasters Batman! After two hours of ripping stitches and cussing up a blue streak, I had the top free of the middle. . . and now to REDO all I had ripped out. . . I got it done and it wasn't the end of the world but now I know - if anyone other than my husband is in the house - step away from the sewing machine!!

On to binding - I promised a tutorial for binding and I did take pictures and will do the tutorial and will link it to this post but I think this post is long enough :) If you have hung in with me to the end, I'm appreciative and thank you! :)  Just a little on the binding - I really loved how all of the angles in the quilt turned out EXCEPT the inverted angles on the side.  No matter how I folded, smoothed, coaxed, cajoled or begged I could not get it to look the way I wanted it to - my inner perfectionist coming out? Maybe :) Enough on that - I will post the tutorial within the next couple of days.

Linking up with. . . EVERYONE! LOL
Monday: Stitch by Stitch for Anything Goes Monday and Patchwork Times for Design Wall Mondays
Tuesday: Freemotion by the River for Linky Tuesday and Quilt Story for Fabric Tuesday
Wednesday: Sew Fresh Quilts for Let's Bee Social and Freshly Pieced for WIP Wednesday
Thursday: My Quilt Infatuation for NTT and Pretty Bobbins for I Quilt
Friday: Devoted Quilter for TGIFF, Richard and Tanya Quilts for LAFF, Confessions of a Fabric Addict for Can I Get a WHOOP! WHOOP!
Saturday: Sew She Can for Show It Off Saturday and My Go Go Live for SewJo Saturday

And finally, Crazy Mom Quilts for Finish it Up Friday.

Whew, that's a lot - I said I was linking to everyone LOL.  Until next time, keep on quilting!!

Follow on Bloglovin


Friday, March 21, 2014

It's Here! Triangle QAL!

It's Friday and it is the official start day of Sassy Quilter's Triangle Quilt Along! YAY!! I bought my fabric a few weeks ago from Pink Chalk Fabrics.  I did some checking, they had a huge selection of Kona solids and (most importantly) they had every single color on which I had my sights set!  When the package came, I wanted to start cutting!! But alas, I did not.  I was in the middle of piecing the Log Cabin Triangle quilt top and getting ready to quilt the Double Pinwheel quilt (which is done, YAY!) so I had to stay focused - this is not an easy thing to do when one has a stack of fabric that looks like this staring at them!!


All beautiful Kona solids in mainly beautiful hues of purple (my personal favorite color) and a few blues and pinks thrown in for good measure :) Here are the colors from left to right:

Blues: Peacock, Azure, Aqua
PURPLE :): Grapemist, Lavender, Violet, Lupine, Lilac, Thistle, Petunia
Pink: Candy Pink, Azalea, Camellia

I will have them all starched and ready to cut next week!! I am going to be using the Creative Grids 12" 60 degree ruler.  No, I'm not going to make 12" triangles but it is the ruler I used for the Log Cabin Triangle quilt and cutting the smaller triangles for the center in those 'blocks' was a snap.

I am still quilting the Log Cabin quilt.  It is looking awesome! Want to see a peak? Well, OK, but just a peak :)

Never ceases to amaze me how quilting changes the look of a quilt top!!

When I decided on the quilting for this, I thought it would go pretty quickly. . . not so much! The quilting is pretty dense on this one and there is a lot of ditch stitching - I can think of other names for it! grin I am doing everything, including the SID with the free motion foot.  I have been quilting pretty much all day for two days. . . It has been awhile since I did quilting in free motion and I have to say - I am having a blast! And as I go along, I can see improvements from triangle to triangle.  This is good! :) I really need to start putting aside a little time each day to just practice FMQ when I am piecing.  Keep those skills toned :)

I am off to finish quilting! I am really hoping to have this finished binding and all by the end of the weekend :) Stay tuned for the big reveal! 

Linking up with Paula over at The Sassy Quilter for the fabric selection portion of the QAL.and Kim at My Go-Go Life for SewJo Saturday.

Until next time, keep on quilting!

Follow on Bloglovin

Tuesday, March 18, 2014

QOV Quilt

Hi All! I just finished the blocks for Kevin the Quilter's QOV block drive :) Link is here - these blocks go together FAST.  OK, I went a little overboard, and just made a quilt top.  This was fast, easy and I have to say the quilt angels totally watched over me because I had no issues with cutting, no issues with getting to the end of the fabric and having major differences in length AND when I sewed the blocks together there is maybe one seam that isn't as close to perfect that one can come! Here it is:


I don't know if Kevin planned it this way but check this out - from a yard of material you can get 9 11x12.5 inch rectangles and 6 12x2.5 inch strips.  Another 3/4 yard of the fourth color will give you the three blocks and the remaining 12 strips needed.  Or it can be mixed up more.  I had a hard time finding a gold that I wanted to use - most of what I found was too yellow (for me) or too baby poopy looking (IMHO).  Bad visual, sorry.

Off to quilt the Triangle Log Cabin! I am totally going to be ready to start the triangle quilt along on Friday - I am on a roll! :)

Linking up with Connie over at Freemotion by the River for Linky Tuesday, Quilt Story for Fabric Tuesday, Lorna over at So Fresh Quilts for Let's Be Social, Lee over at Freshly Pieced for WIP Wednesdays and Kelly over at My Quilt Infatuation for NTT.

Until next time (with a picture of the triangle quilt finish!!!!! Woohoo), keep on quilting!

Follow on Bloglovin

Saturday, March 15, 2014

Double Pinwheel, DONE

Hope you are having a great weekend! I finished up the double pinwheel quilt I blogged about here, and here and finally here I posted a picture of the flimsy.  In those posts I complained a bit about the process. . . but now that the quilt is done, I have to admit, it really wasn't that bad. Kinda like having a baby, never doing it again right after and then a few weeks/months down the road, you forget.  OK, probably not the best analogy ;) 

I decided to quilt this with a big spiral.  I have not really figured out how to keep those darn rows closer together!  I think part of it is that the quilts I have done this on are gifts, I want them to be soft and cuddly and when the rows start sneaking out further and further I decide that's OK... And maybe I don't really feel like ripping stitches. . . probably more that! Anyway, it did wander out as much as two inches but I think it still looks good.  And I quilted this in one day.  Not bad.  I did a double heart in the borders.  I was going to keep going with the spiral and then decided I wanted to add a little something FM on the quilt.  

I also used this binding method.   I have seen many quilts around blog land using this method and I thought this quilt would look super cool with the dark pink binding and the light pink flange.  I decided instead of quilting in the ditch I was going to do more of a top stitch.  I'm kinda into that look these days and to be honest - I'm just not that good at staying in the ditch.  This method results in a very cool look - but be forewarned - it takes more time than regular binding.  Not that that is a bad thing, but of you are working on a project that you want finished very quickly, you might not want to consider this method.  I think the result was well worth the extra time it takes to sew everything together.  

OK, I've rambled on long enough, here are the pictures! :) and a little more info on the quilt follows.

All washed and crinkly :)

LOVE the light pink flange on the binding!!!

See how that spiral just kept getting wider? . . .


Totally digging pieced backs! I NEVER thought I would say that!!! :)


I always put my 'label' on the binding - very subtle in this case but it is there!! :)


Quilt Size: 53" x 64"
Pattern: Pinwheels in the Park by Sew Mamma Sew Side note, I did use wider sashing on the vertical, I wanted the quilt to be wider and thought that was my best bet.
Fabric Front: I'm not going to be able to give specifics on this as most of it came from my stash... The prints are all Kaffe Fassett.  The dark pink solid is a Bella Solid by Moda but unfortunately when I bought it I did not look at the bolt to see the color name.  The light pink solid in the double pinwheel is also from my stash. . . I really wish I could remember where I even bought this from because it is cotton but very much looks like linen. . . . I could 'use' about five more yards of it in my stash!
Fabric Back:  The print is Kaffe Fassett, the large bright blue is Handspray by RJR, the pink is Wovens by Moda and the one lavender is Suede by P&B Textiles and honestly, I don't even have a guess as to what the other one is. . .  
Batting: Quilter's Dream Wool (I just can't stop using this stuff!!)

The lesson I learned in making this quilt, that hopefully stays with me the longest, is don't freak out completely when something is not cut right. . . . I had a little issue with cutting a couple of the squares too big for the light pink triangles.  Of course, I started sewing on that side of the design wall... and that resulted in my throwing a fit (not really but I did stick my tongue out at it several times) and not sewing anything with this quilt for a day or two.  I jumped to many conclusions immediately upon finding the oops - ALL of them were cut wrong (no, only a total of 8 triangles or two blocks), I'm going to have to recut everything (no, just two squares) and I should try creative sewing (OK, sometimes this is an option but I really think when dealing with this type of pattern - that's really not a good idea).

I also learned that my belief that because I soak (yes, soak) my fabric with starch and let it dry almost completely before ironing, I really am preshrinking my fabric. . . I had originally planned to use the pink fabric on the back as the sashing fabric for the front.  I starched the bejeezus out of it, let it mostly dry and ironed it - it shrunk FOUR inches!  I had measured it before starching it because I knew I was going to be just barely squeaking by in terms of having enough.  When I put it back down on my cutting table, I was shocked, and had a good reason to go shopping at the LQS :)  Ummm, OK scratch that - the fabric may shrink when it is soaked with starch BUT I just pulled the quilt out of the dryer - it now measures 53" x 64" . . . That's another FOUR inches!!! Seriously? I am shaking my head.

The other thing I kept thinking as I was sewing the blocks together was - I need to find a tutorial that goes through not how to make HSTs - but how to sew them together and keep those corners! I got lucky on some, not so lucky on others :) Is there an 'easy' way to do this?? If you know of a tutorial or have a trick you are willing to share - I am all eyes and ears!!  

Linking up with Richard and Tanya Quilts for LAFF, Show It Off Saturday at Sews She Can, SEWjo Saturday at My Go Go Life, Stitch by Stitch for Anything Goes Mondays, Patchwork times for Design Wall Mondays, Connie over at Freemotion by the River for Linky Tuesday and Quilt Story for Fabric Tuesday. If you are here from there, welcome! And if you need a good dose of inspiration - go check out what others are doing :)

Going to be working on QOV blocks this weekend (link on top right sidebar).  And then on to quilt and bind the Log Cabin Triangle quilt! Yay :) I gotta get going, Friday is the beginning of the Triangle QAL at Sassy Quilter! The button is at the top of the right side bar, if you haven't already checked it out, hop on over and join the fun!

Until next time, keep on quilting!

 Follow on Bloglovin