
1. I got totally sucked into blog land!! I was spending A LOT of time on my blog making changes and writing posts.... and visiting a TON of other blogs :) there are sooo many really good ones out there! I MADE myself stay off the computer most of the day Saturday and all day yesterday. It was very difficult to not write a post yesterday. . . I am making up for that today though by posting twice! LOL
2. My husband had been off work since before Christmas. He is very supportive of my new addiction but sitting at the sewing machine all day seemed like it might be pushing the limits just a bit... haha
3. Dasha commented on the post mentioned above that her brain 'flicks off' after a quilt top is finished. I have to admit, mine does that too and I am already planning the next one by that point. What I have done to combat this is to not let myself start the next until I have at least quilted the project on which I am currently working. I have one UFO (unfinished object). I told myself I would finish it between other projects.... you guessed it - I have not gone back to it and if I had, it would be finished! So now, before I start my next quilt, I am going to do two panels on my scrappy bargello (that link is to Bonnie Hunter's pattern for the scrappy bargello) quilt. :)
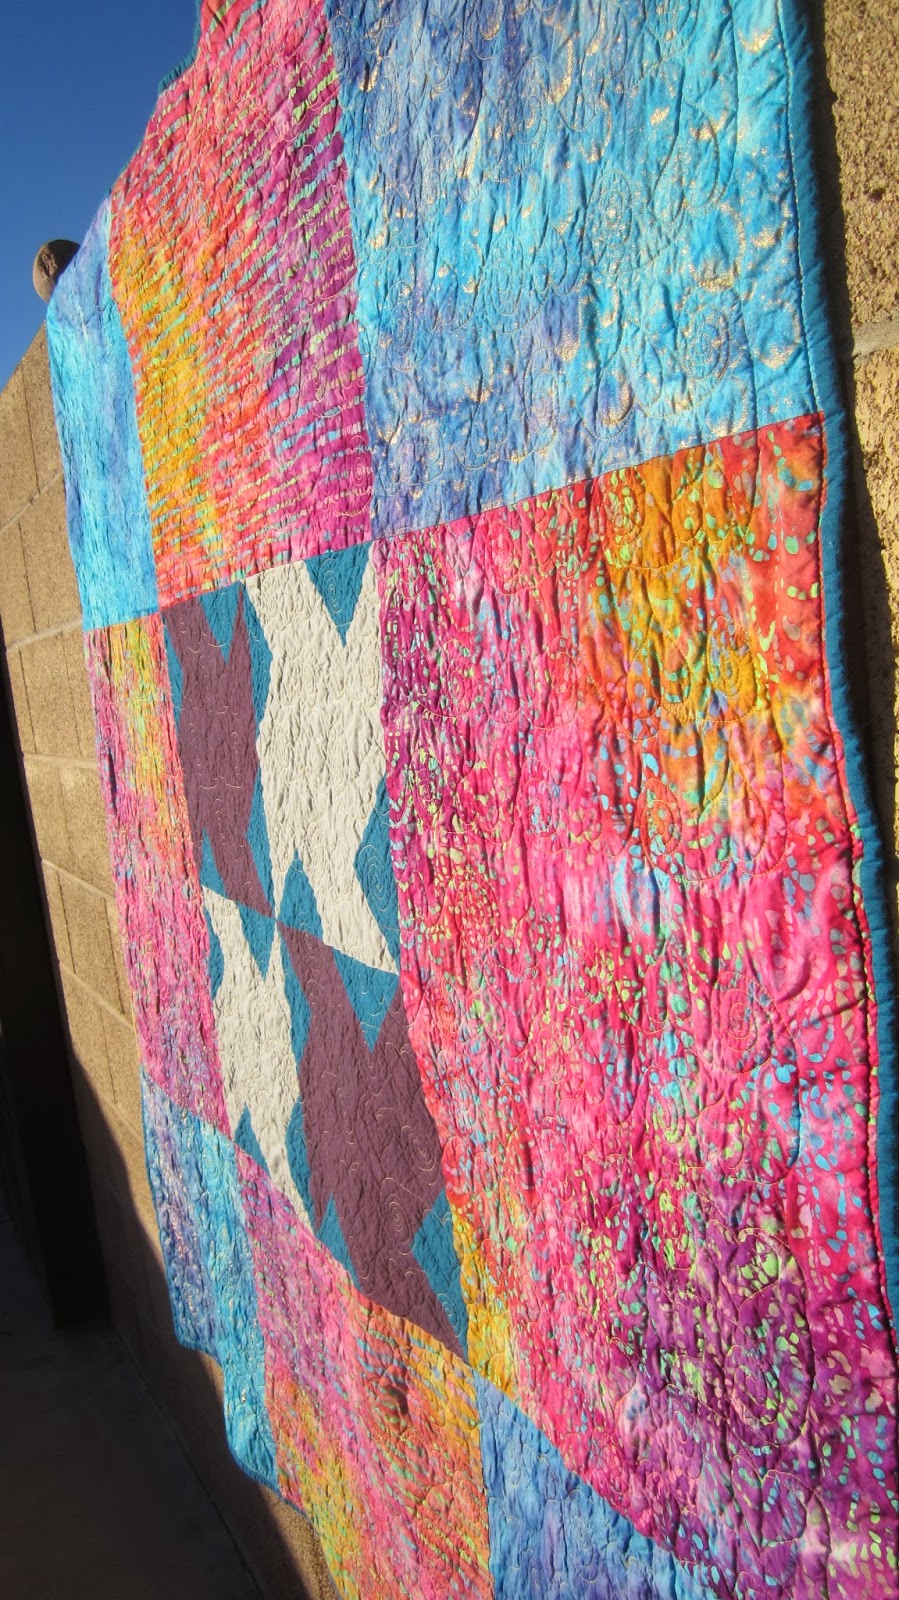
So now on to my finish!! This quilt is made from Kaffe Fassett Shot Cottons (purchased at Hawthorne Threads, LOVE that online store!!) and a few The Beginning Modern Solids (purchased at Pink Chalk Fabrics, this is a new find for me, will DEFINITELY be visiting their site a lot!) thrown in to supplement as I did not have enough Kaffe shots to make the quilt. This is the second quilt I have made with Kaffe's shot cottons and working with them presents a bit of a challenge only because they are very thin, more on that later. The back was pieced using left over shots and batiks (purchased at Connect the Blocks, home of the 40" yard! Gotta LOVE that!!). When I saw this tutorial for the Whirled block at Andy's A Bright Corner blog, I knew I had to make a quilt! Without further ado, here it is!!

 |
| I have really gotten into piecing the back too! :) |
 |
| I try to remember to put some kind of label on the binding, personalizing the quilt for the intended recipient. Shh, she doesn't know this is hers! :) |


The first thing I did was soak (and I mean SOAK) all of the fat quarters (the piecing was all done with fat quarters) with starch. I mentioned that Kaffe's shot cottons are thin and in his book, "Shots and Stripes," he recommends pre-washing (see my previous post about pre-washing lol) and starching prior to cutting. There is a good amount of bias in this quilt so I wasn't taking any chances! I soaked the fabric, laid it out and let it dry for awhile and ironed it while it was still damp. This is another tip from the book, iron the fabric when it is damp to get all of the wrinkles out of the fabric.
I carefully cut and sewed together my first two blocks, put them on my design wall and was sooo excited!! haha Then I did two more (when using fat quarters you get two blocks of each color), put them on the design wall and it looked like this (not a good picture as it was taken with my phone but you get the idea)
 |
| WHAT HAPPENED TO THE PINWHEELS??? |
Wha what??? OK, I was stumped! I studied the block in the tutorial, the block on my wall, I could not figure out what the issue was and had pretty much decided I was going to just go with diamonds.... but then I realized, half the blocks have to be sewn different so I need to figure out the layout of the entire quilt PRIOR to making the blocks.... that had me trying to figure out the layout for a day.... I thought I had cut the block wrong. Then I went to to my LQS, I showed a couple of women the picture and one of them said, take the block apart and sew it the other way. I was completely unconvinced ;) I went home, turned the block over on the wall so the seams were facing out and what do you know? PINWHEELS YAY Seam ripper comes out and the two blocks were taken apart and very carefully this time... sewn back together, back in business!! Lesson? Pay attention to the block layout when sewing! LOL These blocks went together really quickly.... once I got it all figured out haha
Sewing this quilt together was a bit of a bear.... Not only do you have to match up seams, it takes a bit of patience to get those points to match up at just the right spot! My perfectionism came out big time! And yes, the seam ripper did too! I wish I could tell you that I found a quick, easy no fuss way to get those points to look perfect. If you know of a way or have found a wonderful tutorial, please share!
Because I pieced the back on this quilt and the Whirled blocks on the back were not lined up with the Whirled blocks on the front, I went back and forth on how to quilt this quilt. In the end, I decided to do an all over design. I also had no idea as to thread color.... I asked my husband his thoughts and he said - I like that yellow thread..... Yellow?? Really??? In the end, I love the yellow, I'm still not sure about an all over design. It seems that the closer shots are quilted, the more wrinkled they get. I did notice that in the book "Shots and Stripes" I noticed that all of the quilts are very minimally quilted. Something I will keep in mind the next time I work with shot cottons.
So there you have it, my first finish of 2014 :) Now I am going to start sewing those panels for that scrappy bargello!!
Linking up with Sew Many ways Sew Darn Crafty Linky party.

Thanks for visiting my blog and I love your comments! Keep them coming :) Until next time, keep on quilting!!
Update: 1/21/2014 - Linking up to Quilt Story for Fabric Tuesday :)
Excellent quilt! I'm glad you showed the puzzle of the disappearing pinwheel and how you solved it. Also, I love the embroidered label on the binding. What a great idea! (I did notice that you missed a t in the word stitched...unless it is an intentional omission due to some special secret code....)
ReplyDeleteI think my favorite part is the stitching on the binding. I have to remember to do that. Such a sweet way to label it.
ReplyDelete