
I have been working on triangles (inspiration came from Lady Havartine's log pyramid QAL) and have taken pictures of the steps involved in making a log cabin triangle. This is short and sweet but picture heavy. We all like looking at pictures right? Let's just jump right into this shall we? :)
First here is a picture of what the triangles will look like when they are finished:
 |
| Oakshott cottons and Kaffe Fasset |
I am using the Creative Grids 12" 60 degree triangle ruler (LOVE)

First (and this is your first decision and the first place I'm not going to give you precise direction), decide how big to make your middle triangle. I have found, through trial and error, that a middle triangle somewhere between 3" and 4.5 inches generally look the best. I did one that had a 7" middle triangle (picture above on the left) and I think it is a little too large. I am making my middle triangles different sizes. If you made them all the same size, you could figure out the remaining strip sizes and could cut everything all at once. . . would be a HUGE time saver. Decide the middle triangle size and cut triangle.
Second, (yup, your second decision) decide how wide to cut the first 'log.' I have been cutting my middle strips between 3/4" to 3". . . My print strips are all different widths. Again, if you decided to make them all the same width, this would be an awesome candidate for chain piecing.
Now that you have your middle triangle cut, and have picked the width of your first log, sew the first log onto the middle triangle:

Iron the seam (I iron them open) and then trim the strip so the angle of the unsewn sides of the triangle is extended:
 |
| Carefully line up the ruler along the edge of the middle triangle. |
 | |
| Trim both sides, now you are ready to sew on second strip. |
 |
| Someone adept in mathematical things could tell you exactly how long the fabric strip needs to extend from the triangle... I just wing it :) |
 |
| Repeat trimming of both sides of triangle for all three of the strips. |
 |
| I made up the difference with a wider last strip. . . Not sure if this is going to make it into the front of the quilt . . . the more triangles I put up on the design wall, the less noticeable it is ;) |
 |
| Add the second log, same as the first. |
 |
| Make sure the MIDDLE solid line (not the dotted seam line) runs right through the point of the triangle. |
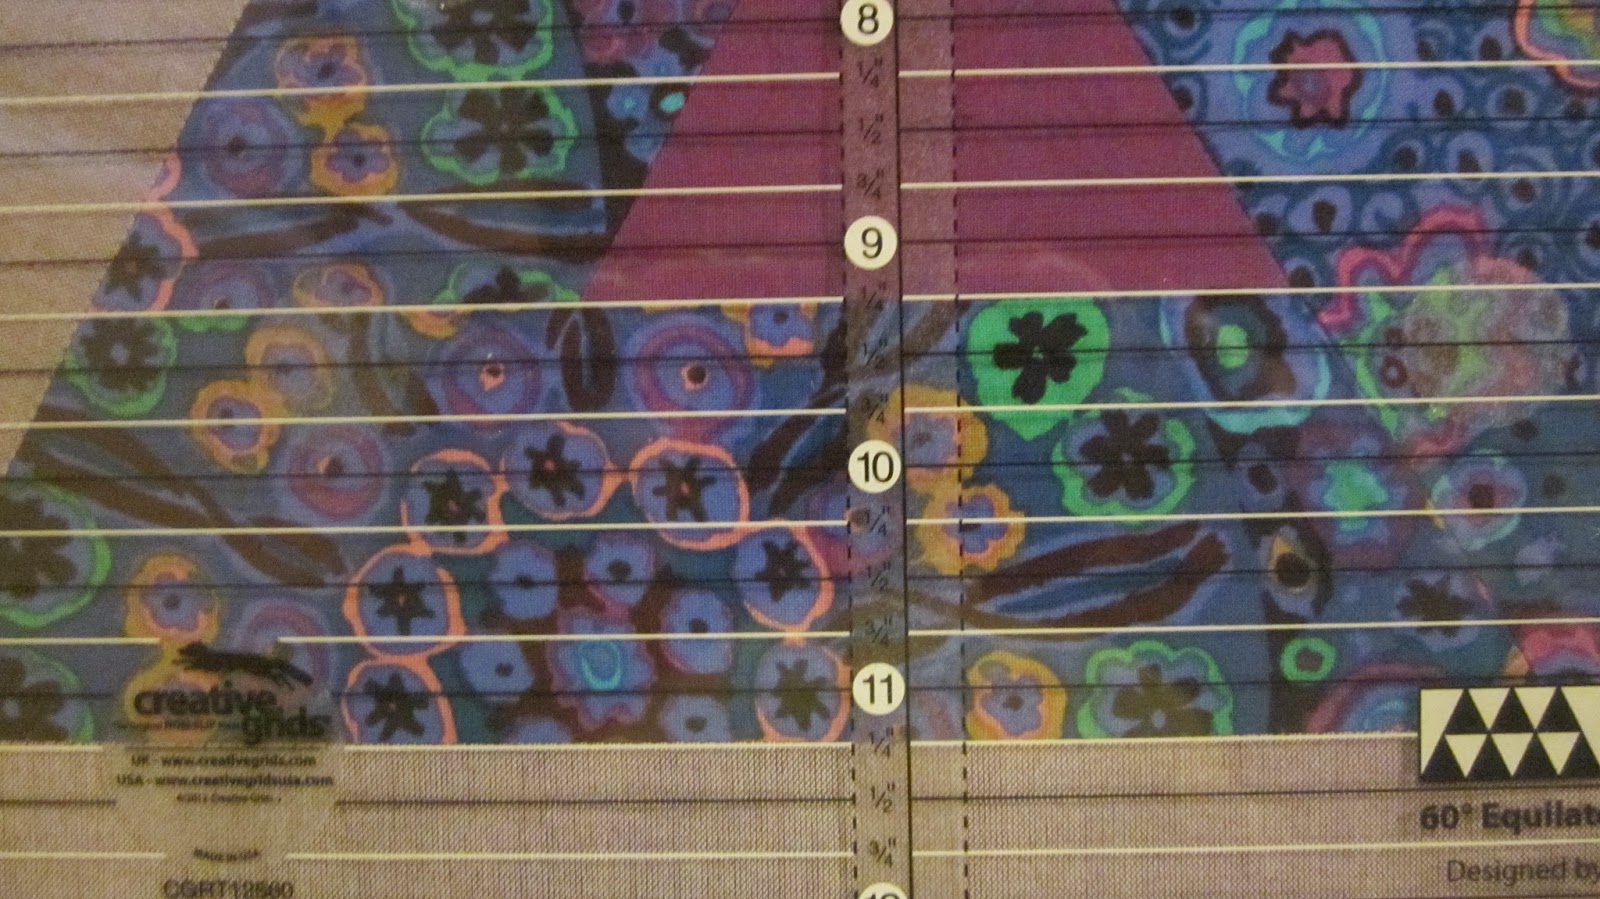 |
| Make sure the seam line is parallel to the lines on the ruler. This will ensure that your block doesn't end up looking wonky. |
I have 13 triangles made. I have not decided how wide or long I am making this quilt yet - hey, I told you I was flying by the seat of my pants! I am going to keep making blocks until I run out of material. That is my determining factor. . . I LOVE making these blocks and we all know I am not a pattern follower so this process fits me well. Here's a bad picture of what is on my design wall this morning:
 |
| I've been kind of deciding on the colors for each block as I go, pulling from the stack of Oakshotts and Kaffe Fasset prints that I pulled for the quilt before I started. |
After taking pictures as I went and writing this up, I just want to send out a HUGE thank you out there to anyone who writes tutorials on their blogs - this has been time intensive and I did not go into great detail. Thanks to the ladies and gentlemen of blog land that share their knowledge freely on their blogs!! I have an even deeper appreciation for all of those tutorials out there!!
Linking up with Anything Goes Mondays being hosted by Valerie over at Val's Quilting Studio, Design Wall Monday over at Patchwork Times, Linky Tuesday with Connie over at Freemotion By the River, Fabric Tuesday over at Quilt Story, Lorna over at Sew Fresh Quilts for Let's Bee Social and Lee over at Freshly Pieced for WIP Wednesday.
Until next time, keep on quilting!!

Thanks for your tutorial. Your instructions are very clear, I shall be trying this soon I feel.
ReplyDeleteAs far as the setting triangles go, if you can't calculate the size maybe it's an idea to lay a piece of paper under the top where a triangle has to be and then draw carefully along the edges of the blocks. As long as the paper doesn't move this should give you a template for your triangles. On the other hand there must be a way to use the perpendicular line on the triangle ruler to make a half triangle.
I loved your tutorial, and it was very clear. As long as you can figure out what you need to do, just go with it, flying by the seat of your pants is working well for you. I found a web site somewhere which calculates how large to make the triangles to inset....but personally I like
ReplyDeleteBut personally I like Marly's method. I'm sure it would work also, just don't forget the seam allowances. (Sorry, but your blogger would not let me finish my first message after I moved to see Marly's name. So I'm finishing it here.) thanks for sharing, these are beautiful "blocks" and your color scheme is wonderful. Thanks for linking up on the Design wall post! I enjoyed visiting with you.
ReplyDeleteRae (nrhaller@aol.com)
Looking good! Cute tutorial! Keep On Quilting On!
ReplyDeleteI had to laugh at your geometry story. Quilting uses a lot of geometry. ;) I totally love your wonky triangle with the one large strip. If you do that on another triangle or two it will look intentional. I think that the dotted lines near your center line on the ruler should help with your setting triangles.
ReplyDeleteI have a quilt started in triangular shape made from scrap strips = but I just cant get into it I think I like the look of your blocks more> Ill stay tuned to see how things finsh up
ReplyDeleteLove what you are doing. I have made several triangle quilts and made one where I split the triangle in half (point to base) with black and white. Turned out nice. I have some leftover- perhaps I could add a row around it like you did.
ReplyDeleteI'm so liking your quilt! I like the different size centers, but see what you mean about it would be easier to just cut strips all the same size. How about just solid triangles at the end of the rows to frame in your great blocks?
ReplyDeleteWonderful tutorial and just another pattern I want to try. You have quite a variety of designs in your photo, from strippy to scrappy and different center sizes.
ReplyDeleteGreat job with the tutorial. I love the triangles.
ReplyDeleteWhat fun blocks and a great tutorial! Thanks for sharing.
ReplyDeleteFreemotion by the River Linky Party Tuesday
Your triangles are looking good. You can use your triangle ruler to measure your setting triangles. Cut your center triangle from the square end of a strip, lining up the strip's end with one of those lines on either side of the center line on the triangle to give you the seam allowance on the side you want to have straight up and down. Hmmm, that sounds clear as mud. Let me know if you'd like me to send you a picture...
ReplyDeleteWhat pretty triangles! Going to be a lovely quilt.
ReplyDeleteI've never seen this technique before. Thank you for providing such a clear tutorial. You actually have me believing I could do this block. The quilt is going to be beautiful.
ReplyDeleteThanks so much for your tutorial. I love anything log cabin, this is beautiful, I am really curious how this is going to turn out. I have looked around at your other quilts, they are stunning. Thanks so much for commenting on my blog. You are so right about this taking up most of my time. I have loved every minute of it. I hope to chat again soon. Stay in touch.
ReplyDeleteJodi
I really like the look. Great tut. I recall doing some blocks like these using the paper piecing method.
ReplyDeleteLove your tutorial. Now I have to shop for the 60° triangle ruler.
ReplyDelete