
I got sucked in by a FQ Bundle on sale at Craftsy. Seriously, $20 for 14 fat quarters of Jennifer Sampo's fabric?? I'm in. And when it arrived (several months ago but they still have it and it is still $20.07!!) I was amazed - people, their pictures do it NO justice whatsoever. None. This bundle has been nagging at me for months. Then I found the perfect tutorial. . . Ever wonder if there is the perfect pattern that will use up every square inch of a fat quarter? Yeah, me too but ladies and gentleman, I found it!! A simple patchwork quilt. When dealing with plaid (ahem, Alycia) and polka dots, what's better?? The simple directions and a link to how to cut the fat quarter can be found at Cluck Cluck Sew. Seriously, literally slivers left of those fat quarters!!
Wondering what it looks like? Here she is! LOVE how this quilt top turned out!
 |
| LOVE! Yup, added the border, read on! ;) |
My initial layout was like this:


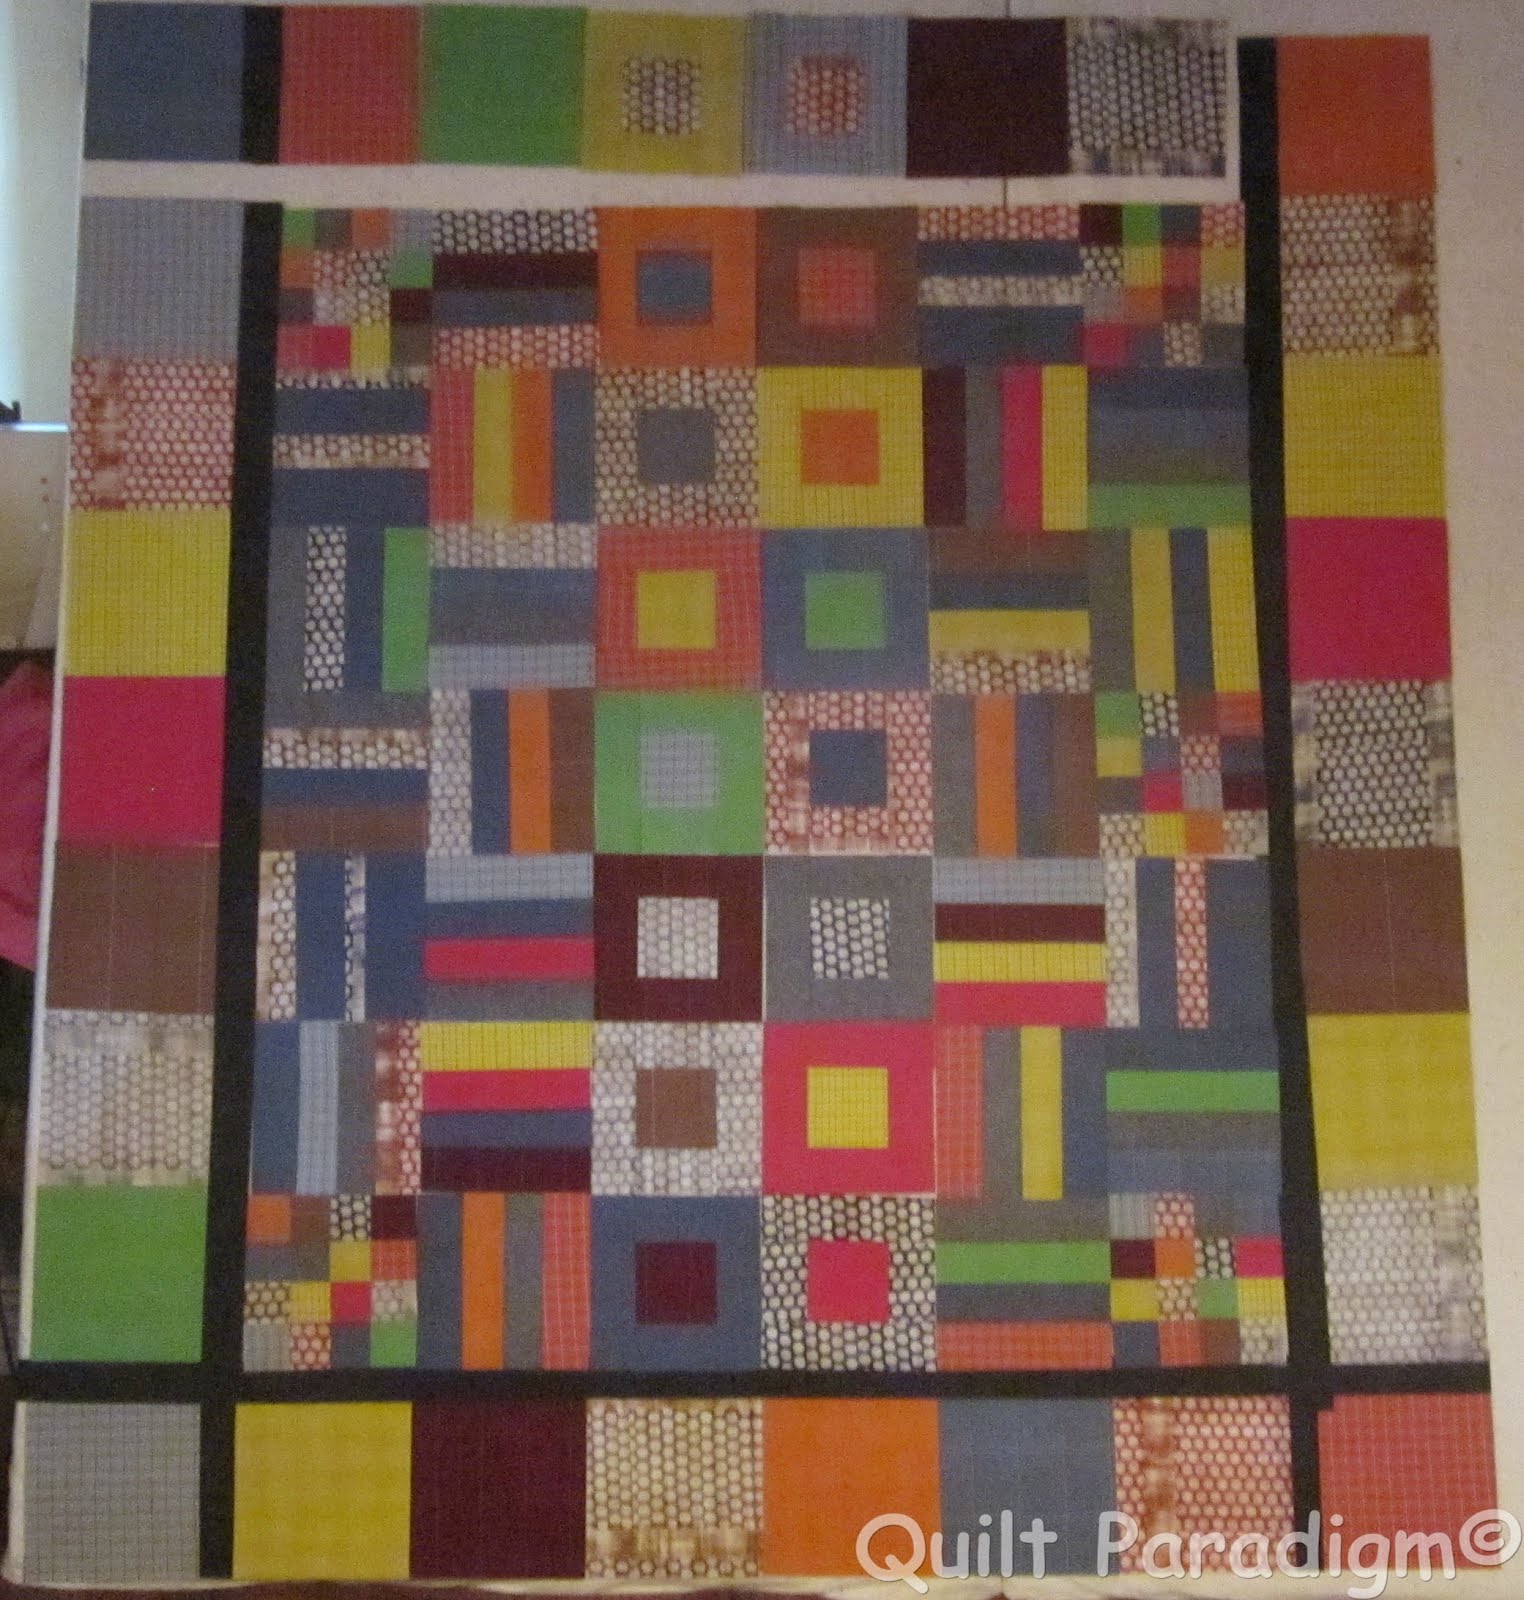
It would be at this point that I fell in love with this top! :D happy camper dancing might have happened!
Wanna see some more pictures? Of course you do!! ;)


 |
| LOVE this picture!! |


A few notes, I had 14 not 13 FQs which is what the lap size called for. I decided I would cut up all 14 and add in some Essex Linen in Black and Nautical. Again, just laying around waiting to be used ;) A few of my FQs were short in terms of being able to get enough 2.5" strips. So I just cut the Essex strips wider to make up the difference so the blocks finished at 8.5." This quilt is 66" x 74" right now. Perfect size for a large lap. I'm not sure how much Essex is in there. . . Bonus - used all of the 'scrap' pieces from making Blaze and Breakaway! :) The black strips were cut at 2", finish at 1.5".
I also used a new product. We all know I love starch. LOTS of starch and I treat (read soak) all of my fabric before I do anything with it. That's my pre-wash cycle ;) haha Anyway, I stumbled on some videos about a product called Terial Magic. Ummm, people, if you are looking for a product that will make your fabric like card stock, this stuff is the shit! Cutting this fabric was a DREAM. NO fraying and most of these fabrics are wovens - we all know how badly wovens fray! No stretching! OK, that could be a bad thing if you are sewing curves. Search the name, there are videos and it can be purchased on Amazon. I'm not affiliated in any way but let's just say a gallon might have shown up on my doorstep the other day. . . I need to do some serious lab experiments with this stuff! Oh, and the smell is not that bad and I'm pretty sensitive to that stuff.
One more thing before I go. I am putting the finishing touches on my applique wall hanging. Yes, you read that right. Applique. Lara's new book Crafted Applique is out and selling like gangbusters! That second link is to Amazon. They are currently sold out but you can still order. Lara is selling books on her site or you can go to AQS and purchase the book there. OR, go to Lara's site, see all of the amazing bloggers that have already and will be posting about her new amazing way to do applique. Each blogger is giving away a book! My day is coming, May 19! Make sure you come back. You can enter the giveaway for the book and see the rest of this. . .

Linking up with DWM and Finish it Up Friday.
Until Next time, keep on quilting!!

Sandra's advice was so perfect. The quilt top was OK but with the rearranging and thin black line it is fantastic! I like how you grouped the pieced blocks in the center. I just looks like it must have flown together. And I am taking a break from putting the finishes on my Crafted Applique project right now. That method is so fantastic; Lara really did a fabulous job and I can't wait to tell everyone about it next week, too! I hope you are doing well, friend.
ReplyDeleteOh, ya!!! The black border makes the rest of the quilt sing! Ooo...I like what I see of your applique project, too. It looks beautiful with the sketchy stitching outlining the petals.
ReplyDeleteI too love that pic of the back! The black border was the way to go for sure to seperate and give the eye a little place to rest. And wonderful to use up a FQ bundle and have such a happy quilt.
ReplyDeleteThe addition of the small inner black border was the perfect touch Judy! (Yay Sandra!) I like your arrangement of the blocks better too. As soon as you showed the back view of the quilt, my first thought was "Holy Cow! Look how perfect Judy's seams are and how neat and tidy everything looks!" Definitely amazing. As a fellow starching nut, I'm going to check out this new product Terial Magic!
ReplyDeleteI'm so excited to see where you have taken your Crafted Applique' project! I love the way your stitching makes the appliques look like ink and watercolor sketches! Thanks for the shout out! :)
I love your diversion!!! A little diversion that turns out like that should always be followed!! Nice job!
ReplyDeleteIt's amazing how adding a simple border can completely change the look of a quilt. That Sandra is a pretty smart cookie. I would have never thought of that. Can't wait to see your project for the hop. Very nice teaser shot :)
ReplyDeleteWhat a fun quilt.
ReplyDeleteI would consider a 3 month turnaround from purchase to quilt top(s) a TOTAL WIN!!!
ReplyDeleteSo interesting seeing the blocks with and without the black border. You and Sandra are brilliant. Love this quilt top.
ReplyDeleteOh how fun - the border really does make a difference doesn't it and I love the stained glass effect picture!
ReplyDelete